Ok, I thought I’d kick this thing off, by installing the most popular NOS (network operating systems) on Qemu.
First I tried the 2.x stuff, and it just crashes on the bootup of the kernel. Which is frustrating, as it required me to shuffle floppies like there was simply no tomorrow. I also have a copy of 4.1, which I’ll do at some other time.
Let’s get to the list of our requirements:
- Qemu 0.9.0 I’m going to use the windows pre-compiled version that can be found here: http://www.h7.dion.ne.jp/~qemu-win/
- MS-DOS, or I suppose you can you any DOS compatible OS. I haven’t tried DR-DOS, or FreeDOS. For this installation I’m going to be using MS-DOS 6.22 that is available on MSDN.
- An IDE cdrom device driver. I’ve had mixed results with various drivers, however I like IDECD.SYS available from: http://www.computercraft.com/cd_drivers/cdromdrivers.shtml
- An ISO Image of your Netware 3.12 CD. For the real unfortunate you’ll have the floppy version…
- Some way to take your license diskette and make an image of it. I like WinImage. Available here: http://www.winimage.com/winimage.htm
Here is what my directory looks like before I get started.
05/31/1994 06:22a 1,474,560 dos622_1.img
05/31/1994 06:22a 1,474,560 dos622_2.img
05/31/1994 06:22a 1,474,560 dos622_3.img
05/13/2007 01:16p 1,474,560 idecd.vfd
01/26/2004 04:25p 79,321,088 netware312.iso
02/19/2007 12:02a 6,248,207 qemu-0.9.0-windows.zip
05/13/2007 10:42a 1,474,560 SYSTEM_1.IMG
03/08/2007 05:22p 102,400 unzip.exe
05/31/1994 06:22a 1,474,560 dos622_2.img
05/31/1994 06:22a 1,474,560 dos622_3.img
05/13/2007 01:16p 1,474,560 idecd.vfd
01/26/2004 04:25p 79,321,088 netware312.iso
02/19/2007 12:02a 6,248,207 qemu-0.9.0-windows.zip
05/13/2007 10:42a 1,474,560 SYSTEM_1.IMG
03/08/2007 05:22p 102,400 unzip.exe
Ok, let’s get started! First we are going to unzip the qemu distribution. I’m using Windows 2000 for my host, so I’ve got the commandline unzip from the execellent distribution here: http://unxutils.sourceforge.net/ Ironically it’s zipped, so I’ll provide a copy of unzip at my site here: http://www.vaxenrule.com/Shared%20Documents/unzip.exe
Next cd into the qemu-0.9.0-windows directory. First we need to make two hard disk images. For whatever reason Netware doesn’t detect the MS-DOS disk partition geometry correctly and will destroy your boot hard disk. Since we are running under an emulator, virtual hardware is cheap, so adding a second disk is really no big deal. The MS=DOS hard disk is only to boot up, so it won’t be big at all. I’m going to create a 32 megabyte boot disk, and a 1 gigabyte Netware disk. You can always add more disks, or go with larger disk. Just be forwarned that my Netware didn’t like the MS-DOS disk’s partitioning. This may be a fault of ISADISK, but then it worked fine on its own disk.
qemu-img create -f qcow netware-boot.disk 32M
qemu-img create -f qcow netware-data.disk 1G
qemu-img create -f qcow netware-data.disk 1G
Ok now with the disks created it’s time to install MS-DOS. I’m going to assume that you have *some* experence with Qemu, and MS-DOS.
qemu -L . -hda netware-boot.disk -hdb netware-data.disk -M isapc -m 16 -net nic -net none -fda ..\dos622_1.img -boot a
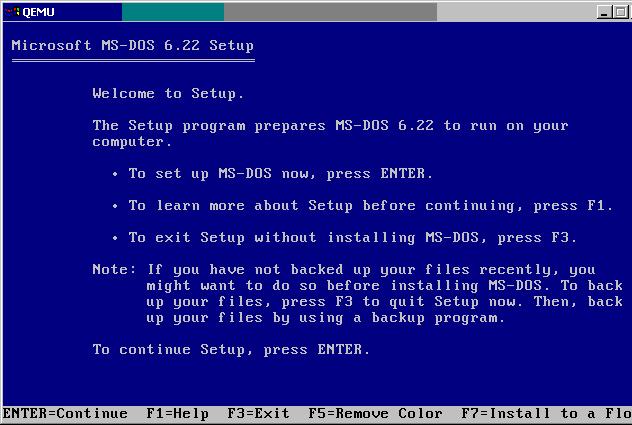
With any luck you’ll be greeted with this image:
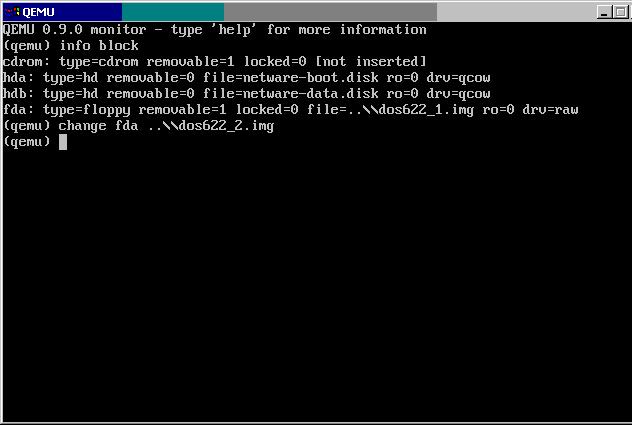
We are going to just accept the defaults (hit enter a few times) which will partition the first disk, and ready it for the MS-DOS install. After enough enters, qemu will reboot, and MS-DOS will format the first disk, and then prompt for disk two. We will want to change disks. This part of qemu can be a little scarry for the uninitated, however its quite simple. Click on the qemu window, then hit CTRL+ALT+2. This will bring you to a window like this:
I typed in “info block” to show what disk images were mounted where. Then to change floppy disk images, simply typing in “change fda ..\dos622_2.img”. Pressing CTRL+ALT+1 changes you back to the qemu display, where you can hit Enter to tell the MS-DOS installation program that you have inserted the second disk image. You will need to repeat this for the third disk.
Once MS-DOS is installed it will prompt you to remove disks and press ENTER. You can simply press enter, and qemu will notify you that your disk is not bootable. Close qemu.
Now we are going to boot qemu from the hard disk, and with the idecd.vfd disk image containing IDECD.SYS.
I’m going to start Qemu as follows:
qemu -L . -hda netware-boot.disk -hdb netware-data.disk -M isapc -m 16 -net nic -net none -fda ..\idecd.vfd
Copy the IDECD.SYS device driver from the floppy to the C:\DOS directory (copy a:\idecd.sys c:\dos). Then you will need to edit your config.sys & autoexec.bat to recognize the cdrom.
Append the following line to config.sys using edit
device=c:\dos\idecd.sys /d:cdrom01
And append the following line to your autoexec.bat
mscdex /d:cdrom01
Information on edit can be found on Wikipeida here. Although if you don’t remember MS-DOS edit, you are going to be in a world of pain when we start Netware…
Ok with the configuration files edited, we can close Qemu, and now start it again as follows:
qemu -L . -hda netware-boot.disk -hdb netware-data.disk -M isapc -m 16 -net nic -net none -cdrom ..\netware312.iso -fda ..\system_1.img
During the MS-DOS install the netware data disk may have been formatted by DOS. This is no big deal, but just keep an eye where your CD-ROM drive is drive letter wise.
To start the Netware install, we now need to type in the following:
e:
cd netware.312\english
install
cd netware.312\english
install
You’ll get some warning about ethernet frame types, which we can ignore for now. Then you’ll be prompted on the install type. We are going to do a new installation, so just hit enter. The MS-DOS partition will be displayed on the primary disk. We can just leave it alone (or we’ll have to start from the beginning!), press enter to retain the current setup.
Next you’ll be prompted for a server name. I’m not going to cover moving data from an existing Netware 3.12 server, so for now I’m just going to call my server “bobo”. I’m going to accpet the preselected internal IPX number. Again if you are migrating you may wish to preserve the exting information. You will next be prompted as to the location of the DOS mode files. Press enter as the defaults should be correct.
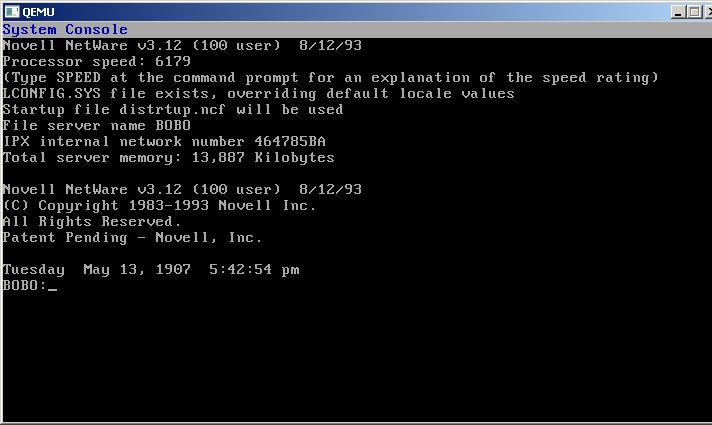
You can press F10, to accept the default locale. Next Netware will ask what naming convention you will wish for your server. If you are going to use ‘modern’ clients on your server you will wan’t the Netware format, otherwise, select the MS-DOS format. Next press enter, as we have no special startup flags. You may allow autoexec.bat to be modified to boot netware directly. The Netware console will now boot up to something like this:
Next let’s load the disk driver. Type in:
load isadisk
It will prompt for the port & interrupt, just press enter to accept the defaults. With the disk in place, its time to install the Netware files so that we can then setup the networking. Type in the following:
load install
You will be presented with the menu driven install. You will want to setup the partition on the ‘data’ disk. press enter twice, then select the second disk. You’ll need to delete any existing partition, then select create a Netware partiton. You can use the defaults (the entire disk). Pressing escape will confirm the partition creation. Press escape to get back to the root menu, now we can create some volumes. I want a 200MB SYS volume, and the rest of the disk as DATA. Of course you may have other wishes, but this is my install.
Press insert will allow you to create a new volume. Using 4k blocks, about 50,000 of them will allow for an approximate 200MB volume. Pressing escape & enter will create the volume. Next create the DATA volume with the remainder space.
You’ll need to mount the SYS volume by selecting it, and then going down to status, and selecting “Mount Volume”.
With your system volume mounted, we can now copy the rest of the files. Press escape to get back to the root menu, and then select “system options”. From here choose the fist option to copy the system & public files. Since I’m using a CD-ROM, I’m going to press F6 and change the path to:
e:\netware.312\english
Then perss enter. Netware will now start to copy the files. This can take a while. Once the copy is completed, press escape back to the main menu, then exit the installer. I know this seems counter intuitive, but its for a good reason.
Now we will want to load the network card. The default location & type of the network card in Qemu is a NE2000 at 0x300 on interrupt 2/9 (it’s a shared IRQ). Type in the following:
load ne2000
Be sure to select IRQ 2 for the Interrupt Number. Next we will want to select an IPX network number for the card. If you have an existing one, use it, otherwise make one up.
bind ipx ne2000
Then type in the nework name when prompted. I’m using DEADF00D.
Now we can re-load the install program. Go back to System Options, and create the autoexec.ncf file. At the end of this file, you may wish to add “load monitor”. Use the escape & save. Select the default for creating the startup.ncf file. With those two files in place we are now ready!
Exit the install program and then you’ll go back to the server console. Type in down, and the Netware server will shutdown. Then type in exit and you’ll get dumped back to MS-DOS. You can now close Qemu. Now you can re-start Qemu with the following command line:
qemu -L . -hda netware-boot.disk -hdb netware-data.disk -M isapc -m 16 -net nic -net none
Or even save it to a CMD file. You will now have Netware 3.12 installed on a new computer!
I don’t think I need to point out that not only is this exellent for preserving an existing copy of Netware 3.12 (Which was *VERY* expensive in the early 1990’s) But by emulating an older PC we don’t have the same worry when it comes to device drivers. Not to mention the Netware server is now portable to newer computers, by simply copying the data files. I’ll save networking this fileserver for another day.
Retirado de: https://virtuallyfun.com/wordpress/2007/05/13/installing-novell-netware-3-12/


Nenhum comentário:
Postar um comentário
Observação: somente um membro deste blog pode postar um comentário.